Shabby Blog Background

Monday, May 23, 2011

Treasury Time! Camp Waana Waana by NinaRandy


How sweet is this treasury? I'm just surprised people still remember how to make gimp! People I talk to never seem to know what I'm talking about when I mention gimp...perhaps it's a region-specific word? I don't know, anyway...

This treasury makes me actually wish I was twelve again, which is pretty spectacular since under all other circumstances, I would NEVER wish the pre-teen years back on anyone.

Maybe it's time for a grown-up camping trip to rekindle those fond memories. If I could go someplace with a sign like this out front, I'd be one happy chick!


 Tell me some things YOU loved about summer camp!

Sunday, May 22, 2011

5 Steps to a Dress: Sewing Pattern for a Simple Dress

This was my very first attempt at making something that resembles human clothes. I stress human clothes because I often make doll clothes for my amigurumi people (I think I've mastered the felted three piece suit). Making real-life people clothes is a lot more daunting, and I really just wanted something I could make uber fast so I could jump right in. SO here it is, a pattern adapted from One Avian Daemon's easiest shirt ever (sort of accidentally as it happens...I cut my rectangles too long).


MATERIALS:


one long rectangle of a drapey fabric
pins
scissors
sewing machine and thread


Step 1.

Fold your fabric in half and cut to desired length and width. To find this, I laid myself out on the table and guestimated about how much fabric I would need to reach to my shoulders and down to my belt line. Make sure your folded edge is the side where you will eventually cut your neckline. In other words, the side where the two pieces meet will be the bottom of the dress.

Step 2.
Pin along the edges that you are going to sew - you want to sew the long sides together and leave a
 gap at the top for your armholes (however much you'll think you'll need). 

Step 3. 

Sew along the long sides that you just pinned, again making sure you don't sew up your armholes. I found that a baby zig zag stitch worked best. 
Step 4. 

Once you've sewn up the long edges, go to your folded over edge and cut out a neckline. I wasn't precise at all in measuring so mine came out a little wonky. If you're particular, then I suggest measuring out the neckline first.

Step 5. 


Turn the whole thing right side out and try it on! It looks a little boxy, but adding a belt or sash helps. I'm ashamed to admit that I don't own a belt, so I just used a jersey-fabric woven necklace I got from thelapdog on Etsy. 


So there ya go - a quick and simple dress for the complete beginner that actually doesn't look half bad! I think I'm going to pick up a pattern or two on my next trip to the craft store to begin tackling more designs. 


If you make your own clothes, share your own tutorials or your favorite websites for sewing technique, tips, whatever!

Saturday, May 21, 2011

Free Amigurumi Tutorial: How to "Prettify" Your Amigurumi Projects

Ever finish an amigurumi project and gaze down at your creation in disappointment? I know I have, a bunch of times when I first started making amigurumi. They'd come out lumpy, distorted, and...not right.

Exhibit A: Clementine Amigurumi Cat by Katy Yellen on Ravelry

Version 1: Taken from the original pattern posting on Ravelry

Version 2: One of my first ever amigurumi attempts for this same pattern:

Obviously, something got lost in translation! What I came up with left me slightly discouraged...this mangled, abstruse demon-creature did nothing but cause me to almost abandon amigurumi. But considering I already spent the money on yarn, polyfill, safey eyes, embroidery floss, and tapestry needles, I needed to make this work. 

And now that I've come a long way, I know exactly what caused my creature to come out looking nothing like...that. I'll take you through, step by step, how to ensure that your amigurumi comes out looking prettier and more adorable than ever before. 

Know your gauge and keep it tight.

Every fiber artist has their own unique gauge - in other words, how tightly they hold the yarn before, during, and after crocheting a stitch. It's a good idea to work as tightly as you can, while still being able to slip your hook into the next row of stitches. This way you won't have open gaps in your project like in my monstrosity pictured above.

Crochet into BOTH loops of the "V", not just one. 
From here on out, I refer to a lot of crochet terms that will probably only make sense once you've tried a pattern or two out before. Basically, when you finish a row of crochet, you form loops on the top that you will then go back into and crochet again. This added row kind of looks like a series of sideways V's. Make sure you crochet into BOTH of these, again to prevent strange gaps and holes. And to give the front of your work a smooth, even texture. If you do this right, you should have no gaps between rows in your piece and you should see little crests on each stitch. 

Example: See the difference between the clementine cat and this guy? Just following these above two steps really makes a world of difference. 
 
Learn how to do the Magic Loop. 

This will help SO much in getting that good, clean start to a project instead of chaining into a circle the normal way. This technique is almost always used with amigurumi because it keeps the ends of a project nice and tight and prevents lumps and gaps. Here is a good video tutorial from The Art of Crochet by Teresa on how to learn the magic loop. It WILL be a massive pain, and it will take a lot of practice, but once you get it down it becomes second nature. 

Learn which side is the RIGHT side of your project.

This might seem pretty "duh" to most people, but I really had trouble distinguishing the right side from the wrong side of my first few projects (the above clementine cat is actually inside out!) This video example by Nerdigurumi clearly shows which way your amigurumi project should ultimately face because it really does make a difference!

Stuff firmly, but not too firmly. 

Make sure that once you're ready to stuff your final piece, that you put enough stuffing in it to bounce back. Try to aim for a squishy feel that's like the pressure of your index finger against your nose. Any looser than that, and your piece will become distorted once you add embroidered embellishments (like the puckered-in smile on my clementine cat example). However, if you stuff it too tightly, you risk distorting the shapes you made which will stretch and disfigure your final piece.

Try out these tips for prettifying your projects before starting your next amigurumi project! Happy hooking :)

Oh yeah, let me know if you have any questions about what I've posted here...if anyone reads this and wants to know more, I'd be happy to do some video tutorials. I'd like to hear your success stories too -- if any of these tips have helped you, post a comment!

Thursday, May 19, 2011

Saving Handmade: Tips to Make Your Etsy Shop a Success


Whether you're a brand new seller on Etsy looking to make your first customer or a seasoned expert seeking a refresher course, these tips and tricks to getting the most out of your online shop will be valuable to you at any point in your crafting ventures. 

Some of these you have probably heard before through the Etsy Blog. Others are tips and nuggets of wisdom that I’ve collected from fellow Etsians over the past year in business; tips which may not be as well-known or obvious but are equally useful. All right, let’s get to the list! Here are my tips:

Encourage variety.
I know this may be difficult for the brand new shops because you may still be finding out what you truly want to sell. However, it will be worth it to open shop with a relatively large amount of stock. Why? I’ve noticed that Etsy buyers really do appreciate variety.

When I first opened shop last June, I had about 5 items total to sell. Thanks to friends and family, I made my first two sales within 24 hours! However, that left me with only 3 more items to catch a buyer’s attention. After a few weeks of non-stop creating and listing, I significantly bulked up my inventory and sales started slowly trickling in after that.

So if you’re considering opening a shop or already have one that could use a little variety, don’t hesitate to keep creating and listing more items! It’s a convenient excuse to set aside some solo crafting time – it’s for the good of your business, after all!

Take thoughtful pictures.
This is definitely a popular tip that I came across many times before deciding to start my shop. The one question that kept running through my mind was, “How”? I’m not a great photographer, I don’t have Photoshop, I have no clue how to get that stark white background like the items that always make Etsy’s front page. And you know what? I still don’t! But I manage, and here’s how:

My photo gallery: litter container and duct tape

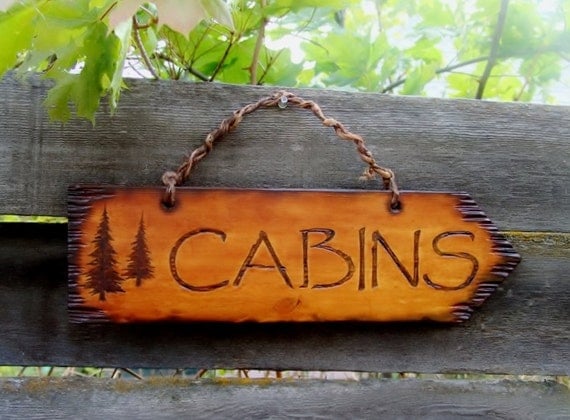
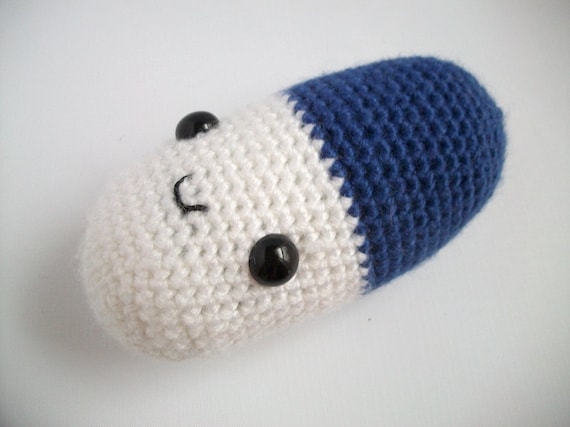
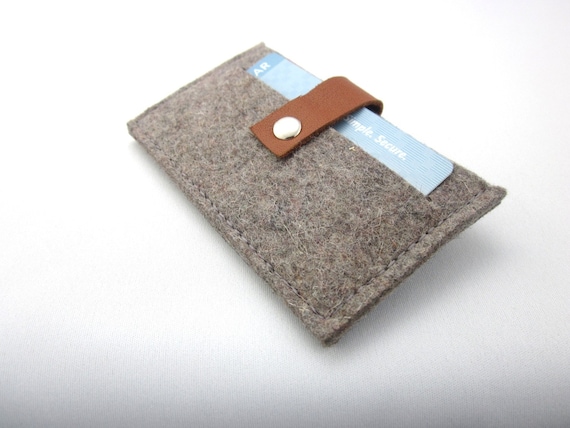
Give yourself a photography area. If your products are on the small side, create or purchase something that gives you enough space to take pictures. Example: you can get a lightbox, find a good spot on a table with adequate lighting, or get creative and make your own photo gallery space!  That way your pictures are “standardized”, in so much that every item has a similar background and is shot in similar light conditions.

Use the macro setting on your camera (mine’s a button with a flower on it, yours will probably be something similar) for close proximity pictures. Don’t be afraid of taking one or two pictures at an angle, or close-ups to focus on particular features. These somewhat odd shots can draw a buyer to your photo (and Etsy Treasuries love them too). Take time and remember to put love into your pictures…if something’s not quite right or your item looks a little blurry, just be patient and try to get them crisp. As with anything, it gets easier and faster with practice.

I could go on and on about photo tips, but for the interest of your time and eyeballs, I’ll continue on…

Be prepared to eat a few costs.
This one you don’t hear about all too often, probably because Etsy does not always want to acknowledge that YES, it costs a good chunk of money to start a successful shop. While money cannot guarantee your success, you should invest enough to make sure you’ll get the most return from your shop.

Things that cost money: Listing an item, selling an item, shipping an item, renewing an item, tools and materials (the easy part), TIME, pretty packaging, boxes, tape and labels, shipping the item, advertising (optional)…among others I’m surely forgetting!

Long story short, you should consider right from the get-go how much you are willing to spend on each of these to get started. Go to numerous shipping websites to find the deal that works best for you (my pick is good ol’ USPS) and figure out about how much, after all your costs are tallied up, each item in your inventory is worth. This will make it easier for you to get an idea for where your items should be priced, and you’ll be starting off fresh with scrupulous business practices! Go you!

Treat people as you would LOVE to be treated.
Let’s face it. Those first few days (weeks, months, YEARS) of waiting to make one sale are filled with nervous tics, nailbiting, and perhaps even questioning the meaning of your existence as a crafter. But when those first few sales start finally coming in, it’s SO important to be there for your customers. 

Send a thank you card with every order, let them know when their item has shipped out, leave them detailed feedback, include a funny story about the creation of your item…anything to let them know that they’re more than just a customer – they’re supporting small craft businesses, they should get a few perks for being an A+ consumer!

from shapingyouth.org
When the inevitable conflict pops up, always negotiate with the buyer. The customer is not always right, but it pays to handle a situation in which both parties come out satisfied with the solution. While you may be firm in your Shop Policies, in the beginning it may suit you to bend the rules….just a little.
Keep calm and carry on.
This is one tip that I’m still learning, but it’s infinitely valuable to anyone having doubts about the future of their shop. When sales seem to come to a halt, DON’T PANIC. When you panic, you may overanalyze your shop in a desperate attempt to find the reason why you’re not having any sales.

As hard as it is to accept, most of the time there is no reason for a lack of sales. In the meantime, keep crafting and try not to obsess over what you can change. If the business isn’t any fun, then it’s hardly worth maintaining!

Don’t lose your passion.
If your shop has you working so hard that you can’t even stop to relax, this should come as a sign to you to pull in the reigns and take fewer orders or raise your prices. What’s the point in crafting if it becomes a daily chore? At least for me, most of the fun in crocheting comes out of the fact that nobody makes me do it. It’s freeing to have a hobby where you are your own boss…be a good manager to yourself. It’s important to get regular breaks and to spend time doing something other than growing your shop. Remember to get out and enjoy life a little!

Do you have some Etsy success tips?  Please share!

Tuesday, May 17, 2011

Treasury Time! Inspired Office by eggagogo on Etsy


I'm pretty sure I want everything in this treasury to go in my office. Right now I have a plastic eel, an amigurumi octopus, and a rubicks cube adorning my office desk. Perhaps it's time to think about growing up!


This felt credit card wallet by Sylvie at Lavenderharvest on Etsy is pretty awesome -- I think Heather Gray might actually be my favorite color (shade?). I always wonder how felt crafters can put together something like this and keep it sturdy enough to last!
http://www.etsy.com/shop/Lavenderharvest

Monday, May 16, 2011

Free Robot Amigurumi Pattern

*Please credit The Nerd's Nest for any replication of this pattern, and please do not use for any retail purpose. Thanks!*

Robots Have Feelings Too!:
Amigurumi Robot Pattern
                                              
Materials:
Size F5 Crochet Hook
Tapestry Needle
1 Skein each of Light Grey and Dark Grey
9mm Safety Eyes
Pink Felt
Scrap of Black Thread
Polyfill

Instructions:

Body:
1.      Ch 22 sts.
2.      Ch 1, Turn, SC 21 sts.
3.      Repeat Step 2 until piece measures approximately 7 inches in length.  Leave a long tail when you finish off for sewing body together.
To Finish: Fold body long-sides together (a.k.a. “hamburger style”) and begin whip stitching across with a tapestry needle. When you get to the last open pocket, thread the yarn
through the body and stitch half way across the pocket. Then, stuff the body loosely with polyfill and finish stitching.

Head:
1.      Ch 11 sts.
2.      Ch 1, Turn, SC 10 sts.
3.      Repeat Step two until head piece measures about 4 inches in length.

Leave a long tail and finish off the same way as you did the body. Be sure to put the safety eyes in at some time before you close the piece entirely.
Attaching the head to body:  Whip stitch the head to the body with the tail you left for stitching together the head. Then, thread  the remainder through robot’s body and cut to finish off.

Arms:
1.      Ch 6 in magic ring (6 sts).
2.      INC in each st around (12 sts).
3-7. SC around. Fasten off, leaving a long tail for attaching arms to body. Stuff arms loosely.
Attaching the arms to body:  With a tapestry needle, whip stitch the arms shut, and then sew arms to body using the same whip stitch method. Use the pictures as a reference.

Antenna:
1.      Ch 9 sts.
2.      Turn, Ch 8 sts. Leave a long tail for attaching antenna to head.
Attaching antenna to head:  With the tapestry needle, thread the tail into the top of the head and come back up through almost right next to where you inserted the needle. Poke the needle through the bottom-most chain of the antenna and push through the head once more. Pull the remainder through to the body and cut.

Heart:
Cut out a heart shape from a piece of pink-colored felt. Secure to the center of the body using a hot glue gun or an ultra-adhesive tacky glue.

Enjoy your cute new robot!


Sunday, May 15, 2011

My Top 5: Best WTF Crafting Blogs

Even the best crafting intentions fall apart. If we can't laugh at ourselves, then why bother putting yourself out there in the first place? Personally, I would be honored if I were to make it into any of these amazing WTF crafting blogs (except maybe #5).


Callin' Out On Etsy investigates and unravels sellers who just aren't doing it right.This blog brings these sellers to the forefront and...well....calls them out on their less than legal sales practices. Some of these are actually pretty amusing, but it's important for stories like this to be told (even though Etsy would like to sweep them under the rug).


The wonders of the human imagination know no bounds when it comes to crafting...after all, where there's a will, there's a cozy to match. At least the poking and prodding is all in good fun!


Themes are a little more mature than Glitter Gone Bad, but the crafting (and the humor) is top notch. There's something innately humorous in misguided crafts - this blog captures the best (and the worst) of them.


This blog made my number two because it's a blog by crafters, for crafters. It's a place for hobbyists to share their projects that went a little....not as expected. 


I don't think it's possible to create a list of the best crafting projects gone awry without the mention of Regretsy. With its unrelenting sarcasm and sizzling humor, Regretsy is my go-to site when I'm in need of cheering up. Gotta respect it!

Anyone else follow blogs concerning crafts gone wrong? Post your thoughts in the comments!